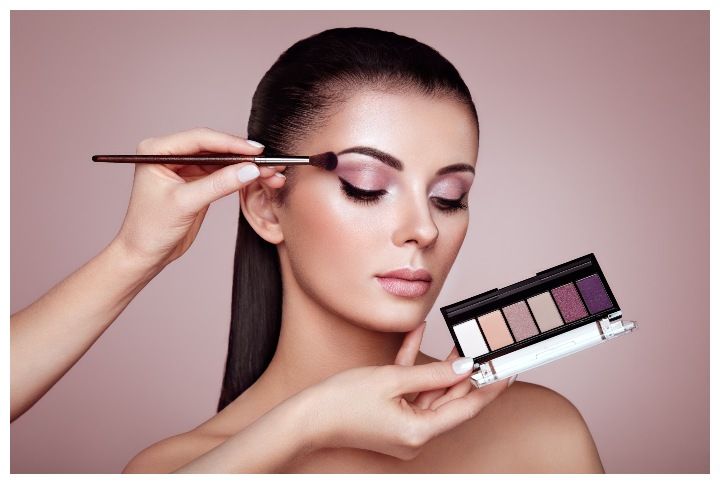
As the saying goes, eyes are the windows to the soul and everyone has their own unique eye shape to call their own. Figuring out your natural eye shape is just as crucial as knowing your face shape. While there are no strict rules as such to follow for makeup, there is however a theory. It’s always a good idea to understand the reasoning behind makeup techniques, that allow you to up your makeup game. The great thing about eyeshadow is its versatility. You can play around with colours, textures and blending styles, where there is no limit to creativity or creating amazing new looks and following trends. But your eye shape isn’t the same as your sisters or friends, so why apply a smoky eye the same way as they do? Lousy eye makeup can weigh your face down or even make you look a lot older than you are. That’s why recognizing your eye shape and the techniques to flatter or enhance them with your choices can make a major difference.
While your eye shape can fall into multiple categories, we’ve listed the most common shapes below with some easy beginner-friendly tips to help you get started. And remember, just because a certain style might not match your eye shape it doesn’t mean you can’t wear it. It’s all about making it work for you.
Keep scrolling below to check out some handy makeup tips for your eye shape:
1. Round Eyes
When it comes to the round eye shape, it’s pretty straight forward. Round eyes are generally large, prominent and noticeably more circular. Rather than being pulled inward or outward, the inner and outer corners are rounded with the cornea surrounded by white. If you have this eye shape you’re in luck as it’s a pretty versatile feature that can carry off most looks depending on what you’re going for.
- Take advantage of the generous eyelid space and play with some bold colours, if you want to accentuate the natural round shape.
- Define your lash line and elongate it with the winged effect on the outer half of your eye with eyeshadow. You can also do a smudgy winged liner to make your eyes appear more almond-like.
- If you want to downplay the roundness, concentrate most of the colour on your top lid only and use only mascara on the lower lash line or a very soft eyeshadow shade.
- Remember to start shaping your winged liner inwards from the lash line rather than the corner. Starting from the corner can exaggerate the roundness of your eye shape.
- Avoid going too heavy-handed on the lashes with mascara and if you want to add false lashes opt for a more subtle lash that’s longer towards the ends to give you that sexy flick.
2. Almond Eyes
You might have almond-shaped eyes if your eyelid is smaller but longer in width. Just like almond with a rounded centre, the eye tapers to a point towards the inner and outer corners. Often mistaken for round eyes, this shape also has a visible crease. A cool trick to differentiate between the two is by looking straight ahead in the mirror. If your iris touches both, the top and bottom lid and you can only see white to the left and right sides, you have almond-shaped eyes.
- Smokey looks, winged liners and winged eyeshadow techniques work fabulously in this case to enhance your eye shape.
- The most flattering eyeshadow technique here includes using a deeper colour in the outer half crease of your eye, but be careful to blend it up towards the temple in a V shape. Winging out your eyeshadow or liner at the outer corners will add more of a lift to your face.
- You can even go thicker with your eyeliner on the lower lash line if you want to really emphasize the natural almond shape.
- Want a more rounded effect? Go higher with your shadow towards the brow bone. But be careful not to actually touch the brows, that can be overkill.
3. Hooded Eyes
A hooded eye is most recognizable from its heavy or sagging brow bone on top of the lid. They have lids that seem to disappear once the eye is open creating a hooded appearance. Not to be confused with monolids that protrude with no crease, the hooded eye creases too much with a lack of depth. The main struggle with this shape is its issue with light reflection placement and creating much-needed depth.
- If you really want the illusion of depth, the best technique to master here is the cut-crease look. This really works to open up the eyes and create more dimension to the otherwise flat surface.
- Consistency is key if you have uneven lids. Use deep-toned eyeshadows on the upper lids and darker into the crease. This too will recess everything, imitating depth instead of bringing all the attention to your hooded line.
- Whether it’s a cut-crease or more natural looks, try and opt for mostly matte eyeshadows on the lid. Strategically place the shimmer or highlight shades only in the inner corner. This will prevent the shimmer from travelling all over the lids and highlighting sections where it isn’t needed and which can make it look uneven.
- Use a nude or white eye pencil in the waterline to make them look bigger and opt for a brown eyeliner when doing a smokey eye, instead of black.
- While it might be tempting to opt for voluminous lashes, go the subtle route here. Try individual lashes so you can build an effect to your liking or opt for strip lashes that are slightly longer in the centre and shorter in the ends for a more rounded eye look.
4. Monolids
Mostly common in men and women of Asian descent, a monolid eye features a less apparent crease. It’s a shallow eyelid that barely has a crease and doesn’t reveal much of the eyelid, even less so than a hooded eye shape. The monolid is a beautiful smooth canvas that is very flexible and allows you to experiment with so many looks. Another great thing about this eye shape is you can follow most of the advice given for the other shapes as well! So if you’ve got monolids, embrace it wholeheartedly. There’s no limit to what you can do.
- Monolids are very prone to eyeshadow fallout and smudging so priming your lids is super important. Use a little bit of your concealer or a dedicated eyeshadow primer to prep.
- Try and follow the natural shape of your eye along the lash line, moving upwards to maintain that lift for your eye rather than bringing it down.
- Experiment with some exaggerated graphic liner, that doesn’t have to be just a wing or cat-eye. Try trendy fun shapes like square or rectangular styles. You can even go full drama with an incredibly thick sculpted liner.
- Go for a strong smoky eye look to create a stronger crease effect. Monolids always look fantastic with some dark eyeshadow to define the top and bottom lashes.
- Go bold with some wispy and wide false lashes to open the eye and give the effect of bigger brighter eyes.
5. Downturned eyes
Opposite of the upturned eye, which is essentially any eye shape where the outer corners are lifted, the downward eyes outer corners are lower than its inner corner. The upper lids also generally slope down to meet the lower lash line. In this case, lifting your eyes is the main focus, as the downward turn can sometimes make you look sleepy.
- Keep any darker shadows to the top lash line and crease, avoiding the lower lash line and outer corner, as smoky eyes or any darkness can accentuate the droopiness.
- The cat-eye look will be your best friend here.
- Use a light coat of brown mascara on your lower lashes instead of black. Also, opt for flared lashes with an upwards curl in the outer corner.
- You can even draw the eye upwards by brushing your brows in that direction
- Highlighting your brow bone as well can pull the attention and counteract the drooping.
Did you find any of these tips helpful? Let us know in the comments below.
Follow @missmalinibeauty on Instagram for more updates.

