Remember we taught you how to bake yummie Chocolate cupcakes in our earlier Cupcake Masterclass? This time we will be learning how to make some fun edible decorations to go with the spooky Halloween theme. Happy baking! xoxo
Now that you have learned to bake Chocolate Cupcakes and the Frosting, we will be making some Halloween themed edible decorations: a Witches Hat, Broomsticks, Casper- the Ghost, Zombie Eyeball and Witches Fingers. First things first! Make sure you have all the tools and ingredients to make your scary sugar treats.
Tip: you can use marzipan if you are not able to procure the sugar paste fondant.
1) Witches’ Hat.
Step 1: Colour your fondant or marzipan a rich dark black. Once you have done this roll a small amount out with a rolling pin.
Step 2: Cut out a circle with a sharp knife.
Step 3: Cut out a triangle (it doesn’t have to be perfect).
Step 4: Roll triangle into a conical shape as above.
Step 5: Place cone onto the circle you had previously cut out, it’s a witches hat!
2) Broomsticks.
Step 1- 3: Colour your fondant a deep chocolate brown, and roll out gently using one hand until you get a narrow log shape.
Step 4: Cut the long log into smaller sticks, large enough for one cupcake. Then roughly cut out triangular shapes from the fondant, one for each broom.
Step 5: Slide the knife vertically down the triangle, gently, so as to create the effect of the broom but not cutting up the fondant entirely.
Step 6: Once you have done this, attach to the end of the stick – and there you have it, a broom! Harry Potter would be so proud!
3) Casper – the Ghost.
Step 1: To make our friendly ghost, firstly roll up two balls of white fondant, and stack them upon each other. Then with a rolling pin roll out a third ball to flatten it out.
Step 2: Using a cutter make a circle shape. If you don’t have a cutter, use the mouth of a glass, a saucer, or anything round that you can cut around!
Step 3: Place the cut out circle onto the two stacked balls
You’re one boo away from your finished ghost!
Step 4: All you need to do is give it a face by rolling out small beads of black fondant for the eyes and mouth, all done!
4) Pumpkin.
Step 1: Roll out a ball with orange coloured fondant, and slightly compress to give it a pumpkin shape.
Step 2: Then with the back of a small knife, make linear grooves to create the bulges in the pumpkin.
Step 3: With some brown fondant, or whatever colour you like cut out the face of the pumpkin, giving it a smile or a frown depending on your mood!
Step 4: Finally attach by gently pressing onto pumpkin!
5) Zombie Eyeball.
Step 1: Roll out a round white ball of fondant, and the same with green and black, from large to small size.
Step 2: Then roll out very thinly and gently strips of red fondant, this will be the bloodshot veins in your zombie’s eyes. Gently place them on your rolled out white eyeball.
Step 3: Cut out a small circle from the green fondant and compress the small bead of black fondant to make the pupil.
Step 4: Your zombie eye is looking right at you!
6) Witches Fingers.
Step 1: Taking flesh coloured fondant gently roll out with your hand into a narrow log shape, and compress between fingers to give the effect of knuckles.
Step 2: Cut to make 2 fingers.
Step 3: Take thinly sliced almonds and attach as fingernail.
Step 4: With a sharp knife create creases in the skin.
You’ll be licking your fingers after this one !
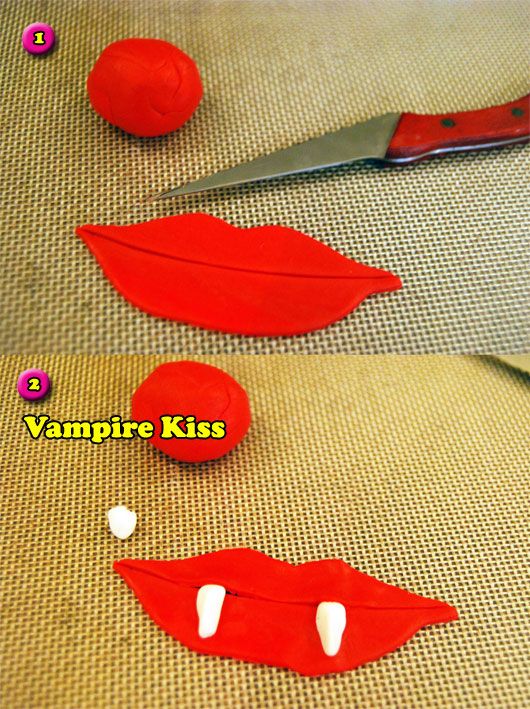
7) Vampire Kiss.
Step 1: Roll out some bright red fondant with a rolling pin, and with a sharp knife or if you have a cookie cutter cut out a lip shape. Cut across to create the crease in the lips.
Step 2: Roll out two sharp vampire teeth and place in the middle of lips.
Eat with caution! 🙂

